
 |
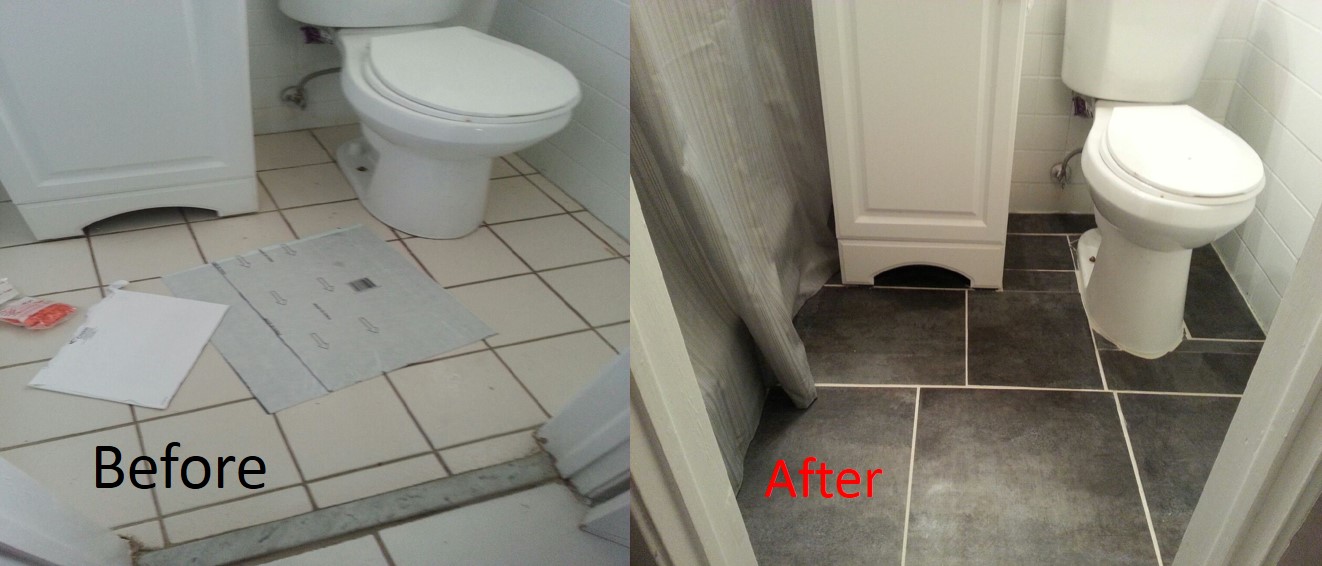
| Before- sad bathroom! |
For months I have been researching different groutable vinyl tiles because I did not feel like ripping up tile and all that jazz. I wanted something cheap and easy and this fit the bill. I set off to lowes with the color in mind but as usual, I had told my husband that If something was on sale, I would buy that. My Lowes is in the middle of a remodel so this was on clearance and Each piece was $1.42 (18 x 18 squares) . Either way- because the bathroom was so tiny, I only needed 6 squares to complete this project. Always buy extras though because you will be cutting this stuff and its easy enough to mess up.
Here is the brand I used- It looks like maybe they are no longer carrying it in our color
If those are not something you like or you want to go a little smaller, this gives a similar color scheme and is a bit smaller. It is also pretty cost effective.
I was scared- Truth be told, I was petrified. I had heard only good things but I knew that this was going to rest on my shoulders. This bathroom is so small that it was a one person project- two of us could NOT have fit in there. Being the one who did all the research, I figured I would do this myself and let my husband cheer me on from outside the bathroom (he did!)
Project time was around an hour but I kept looking up youtube on it, laid out every piece meticulously, then rearranged. So many people have "their way" - like some say start in the middle- some say start at the ends and work your way in- I like non symmetry so that's what I went with here. I used two tiny strips by the door jam (unpictured) then started laying different pieces in different ways- Some of the trimmed pieces went one way and then I put a different trimmed piece the other- I loved it that way but Mostly because It is a small room and needed some "edge"
I decided against using the tile spacers (not reason) and by the toilet I should have but I am putting a rug there anyway so OH WELL! So many tutorials said to remove the toilet and sink but since this room is not used a whole lot I did not care to have it that perfect and as luck would have it, I was able to slide a piece of tile under the sink and not even have to worry about that!
 |
| Time to Grout |
 |
| Mid Sticking |
As promised with all the tutorials- the worst part IS going around toilets if you do not remove it! By far it was the worst (and sloppiest part) I am hoping by the next one, It will look awesome!
I did all my cuts first, laid it out to see how it would look and then started sticking- The tiles will shift for a bit so before you grout, be sure to check the shifts and rearrange. I am sure if you use the tile margins, this would not happen.
Overall, I am very happy with this update for a mere $18.00 and learned some little tricks (which I included below) I will likely do another bathroom in the near future and I will update on that as well.
 |
| Tada- After! |
Couple tips
1. Make sure you are using a brand new blade in the utility knife. You need these babies to be sharp
2. When making a cut, do it from the paper side on the back, then snap the tile and cut straight down while it is folded
3. Have alcohol on hand to clean up your hands in between from the adhesive.
4. Use another piece of tile to drawn your straight lines unless you have a yard stick if you are using the 18x18. If you are using the 12x12, you can use a ruler.
Items you need and totals I spent:
Bucket (Had it)
Sponge (you can use a grout sponge, I just used a couple I had on hand)
Trowel (had it)
Utility knife (had it)
Grout ($10.50)
Vinyl Tiles- 6 pieces at 1.42each = $8.52
Tile spacer- (Had, but decided against using them at all so basically optional)
Paint (We are painting the top of the bathroom Red from the front door!)
Total for the "small bathroom redo": 19.02 - 5% Lowes Coupon (you can also sign up online for their 10 off 50 mailer) = $18.07
And one more time because It is pretty cool.....
No comments:
Post a Comment